
Materials used:
Mid-weight wool (80%)/acrylic (20%) for exterior and front facing
Acetate for lining
Fashion Fuse woven interfacing 55 g/m2 as interlining for whole front (excluding revere and excluded SA from center front to corner and down front edge), upper back, front facing, sleeves to 2 inches above elbows, trimmed 1/4 inch off interfacing wherever it was included in the SA
Stayflex woven interfacing 79 g/m2 for revere (not SA), upper collar, pocket welts, sleeve tabs
Linen for undercollar interfacing
Medium weight hair canvas for breast plate from Hawes and Freer
Columbina domette from Bias Bespoke Supply Company
Raglan shoulder pads from Hawes and Freer
Guttermann polyester thread; contrasting topstitching thread for topstitching
Black cotton twill tape (preshrunk) on back lower foldline along vent, along armscye seams, and at cuff fold line
Horn buttons from Hawes and Freer
Machine info:
Janome Memorycraft 6600 Professional; 2.5mm stitch length (3 for topstitching); 4 thread tension
70/12 universal needle; jeans needle for topstitching
Changes from original pattern:
1. I couldn't find a good matching wool fabric so instead of lining the whole coat with contrasting fabric, I cut the front lining piece in two lengthwise, added seam allowances, and made the front half a facing made from the primary fabric. I lined the rest of the coat with paisley acetate lining.
 |
| Front lining cut in half and SAs added |
 |
| Resulting front facing and front lining |


3. For the collar, I used David Coffin's technique on interfacing for a convertible collar from the same chapter described above. This technique involves making two roll lines, an upper one for when the coat is buttoned to the top and a lower one for when the lapels are open. The interfacing is cut on the upper roll line and then rejoined using lining fabric(see photos below). I padstitched the undercollar. Sorry, I can't find the photo of all the padstitching. I also added centre back seams to the collar and undercollar so I could match the plaid to the back of the coat at the centre back.


4. I added a breast pocket on the left side using this method from The Sewing Academy. Because of the breast pocket, I couldn't make a double entry pocket on this side. But I don't suppose Ross would have a lot of need to get through his left coat pocket into his pants pocket as he is right handed.


4. I added a breast pocket on the left side using this method from The Sewing Academy. Because of the breast pocket, I couldn't make a double entry pocket on this side. But I don't suppose Ross would have a lot of need to get through his left coat pocket into his pants pocket as he is right handed.

5. I made bound buttonholes for all the large butonholes down the front using the ebook How to Make a Bound Buttonhole by Karen Ball. I used automatic key type buttonholes for the cuffs and the top button on the collar.
 |
| Markings for bound buttonholes |
 |
| With welt |
 |
| Preparing the back window |
6. I added raglan shoulder pads.
Other details:
I made a muslin first but I don't think it helped much as the fabric was so much lighter.
I thread basted all the seam lines with cotton thread run through bees wax (which helps avoid thread tangles) as I was expecting to make alterations. When I did the first fitting with the shoulder pads basted in, the upper lateral sleeve was too full. I didn't want to take in the outside sleeve seam as it was already sewn and topstitched so I tried taking it in at the armscye - bad decision - it didn't work at all. So I bit the bullet and took out the topstitching and the seam. I then took in that seam line starting just above the tip of the shoulder, decreasing gradually to 1/4 inch of the SA emoved from each and tapered back to zero at the elbow. I also had to take in the side seams up to 1 inch on each piece. I guess I should have bought a size 40!
I made the fold line for the revere from just above the the top large button hole to the notch at the neckline.
I reinforced the pocket facings with linen as I didn't think the lining fabric would be sturdy enough. for what men put in their coat pockets - keys, change etc.
I did a fair bit of tacking at the end: the double entry pocket welt to the chest plate, the undercollar to the outercollar at the neck seamline, the lining to the main coat at the bottom of the armscye.
When I pressed it at the end, I used lots of steam and for the collar, I pressed it around a rolled teatowel.
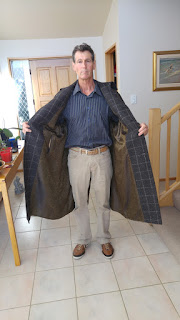
And here is the final result. I'm happy and so is Ross!


No comments:
Post a Comment